

HDR is short for High Dynamic Range. In short, it’s a way to get more latitude visually than your sensor can do on its own with a single exposure. Still cameras often do this with bracketing or an external triggering device that allows many exposures of the same shot to be blended in post. Regardless of the camera you’re using, HDR deals with multiple exposures.
The RED Epic has an HDR feature which records two tracks: an A track which you expose for your primary content and an X track which exposes for highlight protection. It does this by recording both tracks at the same time and adjusts the shutter speed for the X track to compensate accordingly to achieve the desired exposure for your highlight protection. You get to choose how many stops of highlight protection you want for the X track.
Through RedCine-X Pro and various NLEs that allow you to work with the raw RED files, you have a few options to work with the Epic’s HDR footage:
- You can select a single track and simply use that – the footage will always default to the A track and if you choose not to do anything with HDR processing or compositing, this will most likely be the track you use
- You can select an option to “blend” the two tracks which will offer a 1 to 100 value slider with which you can choose your level of blending. Honestly this isn’t bad – but for my tastes, it pretty much looks like I simply chose a different exposure between the two existing exposures – no different than setting the iris accordingly at the time of capture. The highlights are often still a little bit lighter than I want them to be and the primary content ends up being a darker than I want it. *NOTE – I am not a professional colorist. This option in the hands of a true colorist might be spot on perfect solution.
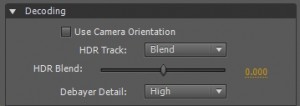
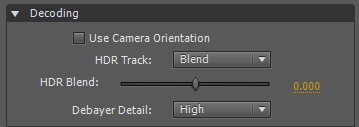
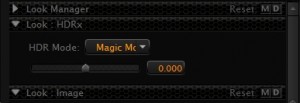
- With RedCine-X, you can choose a Magic Motion option which is a little more in-depth than the Simple Blend option and gets into making sure your motion blur is how you want it to be with the blended HDR tracks.

Now here’s the issue – if you’re reading this quick tutorial, you probably don’t have a Hollywood caliber colorist working with your footage. Very few projects that I’ve ever shot have had the budget for major post-production work – so as independent filmmakers we do the best that we can. With that, I present to you the primary concept and process for reclaiming your highlights of your RED Epic footage without darkening your primary footage (track A).
Whether you’re working in After Effects for your whole project or round tripping the footage to be processed from an NLE, the method I use for quick HDR processing is done with luma mattes and quick masking inside After Effects. Based on this concept, you may find a variation on the process that works better for you – or can be adapted to a different program for compositing. Please feel free to comment below with your input and results. Familiarity with After Effects is beneficial to do this – in fact, if you’ve ever done “sky replacement” process – a lot of these steps will be very familiar:
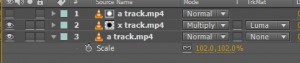
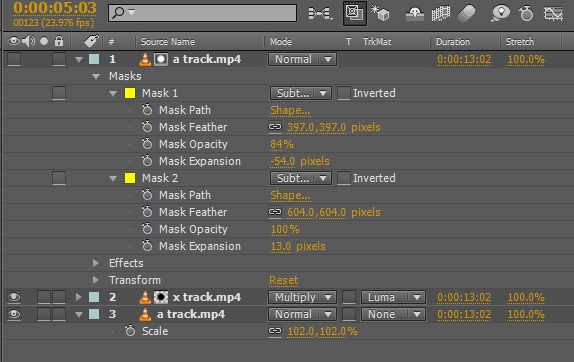
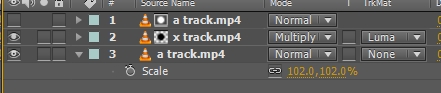
- Set up the A track as the bottom track in the sequence. The X track will go above it as the second track and set to multiply. A duplicate copy of the A track will be the top track. All of the tracks should have the same start and stop point for proper visual alignment in the compositing process.
- Set the X track’s track matte option to Luma Matte for the duplicate of the A track which is above it. This is what helps put the X track footage in all the right places.
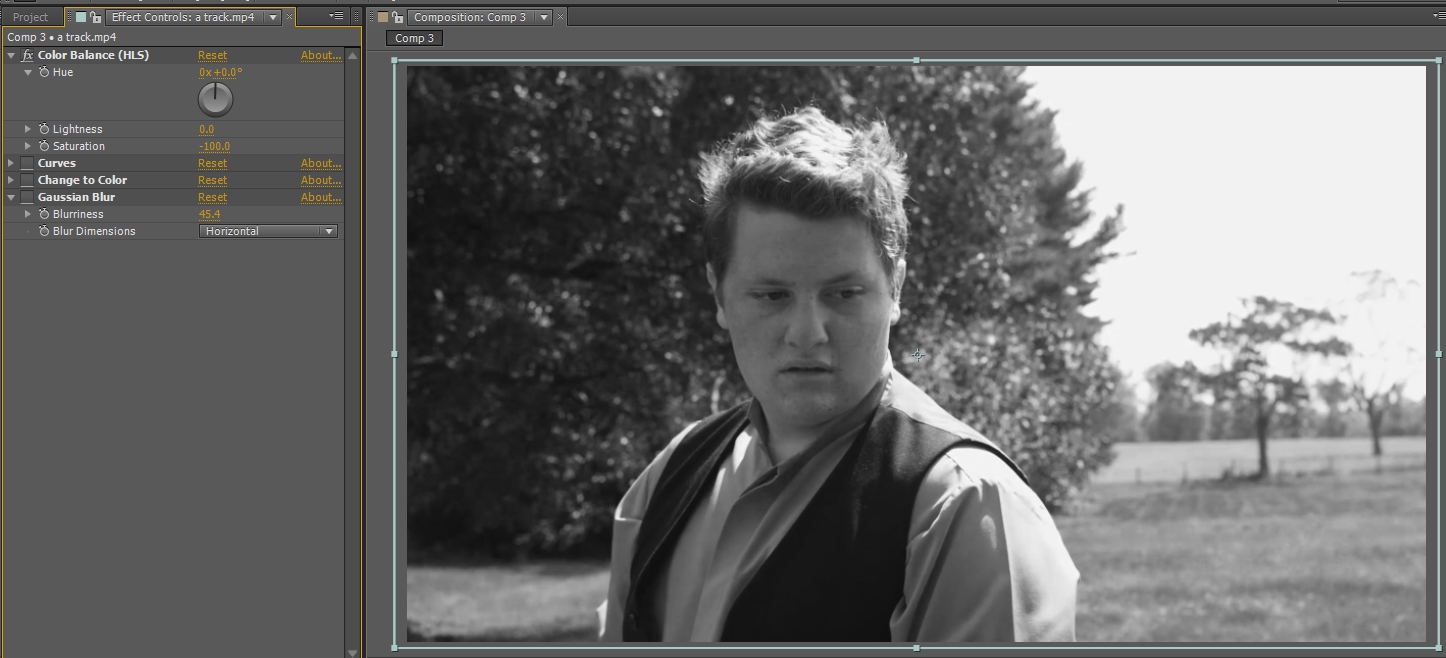
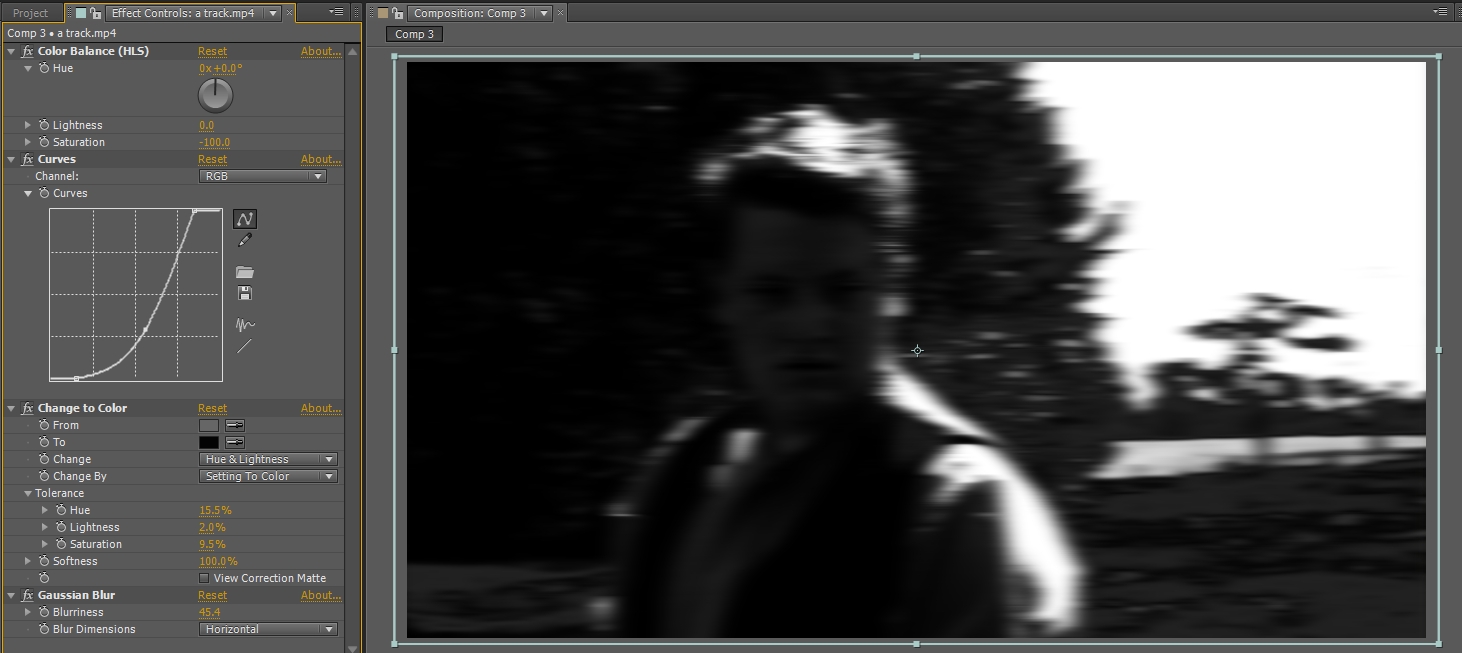
- Apply the effect “Color Balance HLS” and set the saturation to “-100” to the top track “A track duplicate”. This will render a black and white version of footage.*If you haven’t worked with Luma Mattes before, they work on grey scale for transparency and this is why we do this step. White areas a full transparency and allow the matted footage to be composited. Black areas are zero transparency and will not allow footage to be composited. Grey areas have varied transparency based on shade of grey. This is why we do this step.
 We don’t really want grey areas so these next steps are to help remove and reduce these spots for easier compositing.
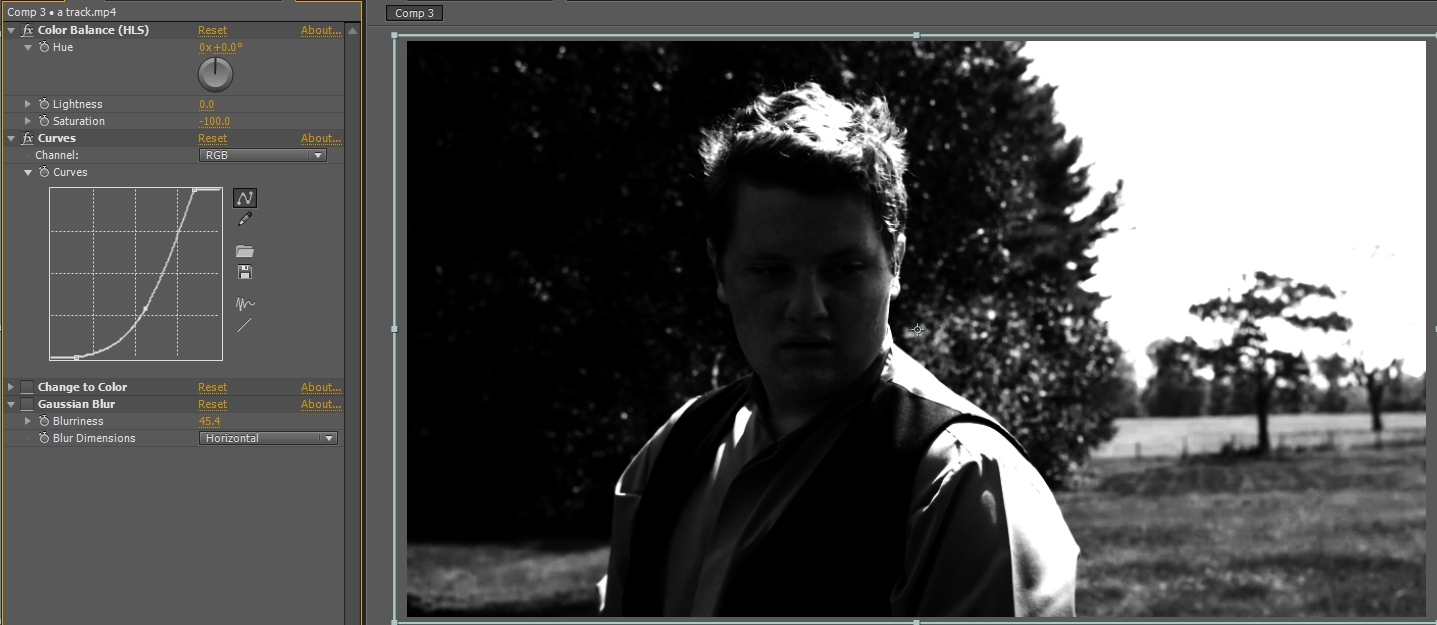
 - Apply the effect “Curves” or “Levels” to boost contract on the A track duplicate layer. In the example pictured, I probably could have pushed it a little more – those settings were copied and pasted from one of the previous clips and I did the compositing really quickly without paying too much attention. I still got a solid result though.
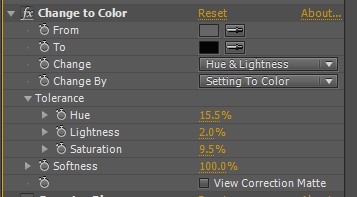
- Apply “Change to Color” to the A track Duplicate layer and turn your grey areas to black. You’ll have to test the various tolerance settings to find the best result.
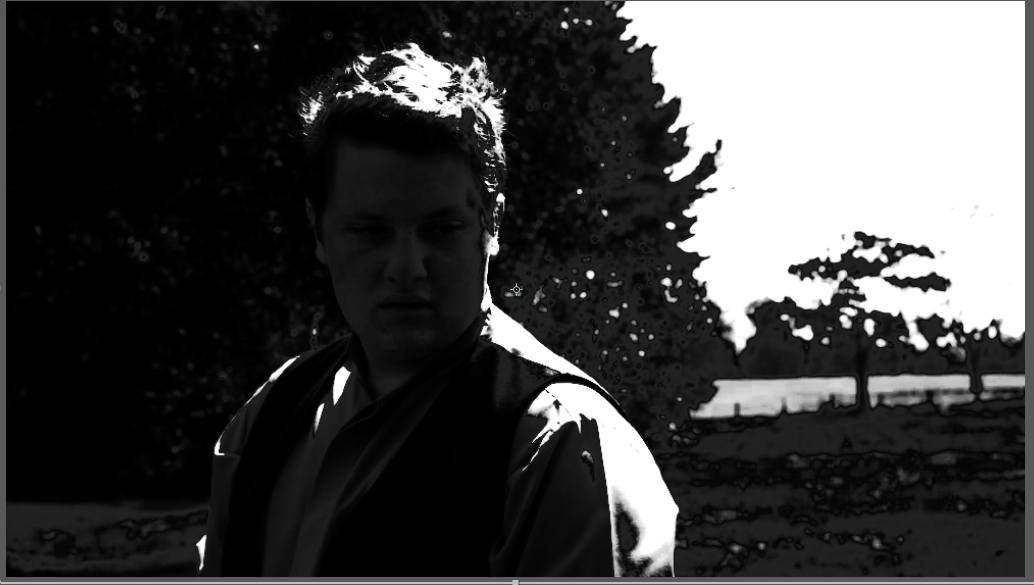
- You will probably find that there is an overly defined edge between the X track and the bottom A track. To combat this, apply a blur effect to the top A Track Duplicate and find a suitable blur amount to help blend the edges of the two tracks. You will find that if you blur too much, you will start to get a halo effect like in many poorly done HDR photographs – so keep an eye out for that and make sure not to overdo it.
- At this point, you should be ready to do some quick masks to make sure no spots of grey or white are compositing X Track footage onto the bottom A Track in any unwanted places. Make sure to deselect the visibility for your top layer A Track Duplicate so you can see the effects of your adjustments taking place.
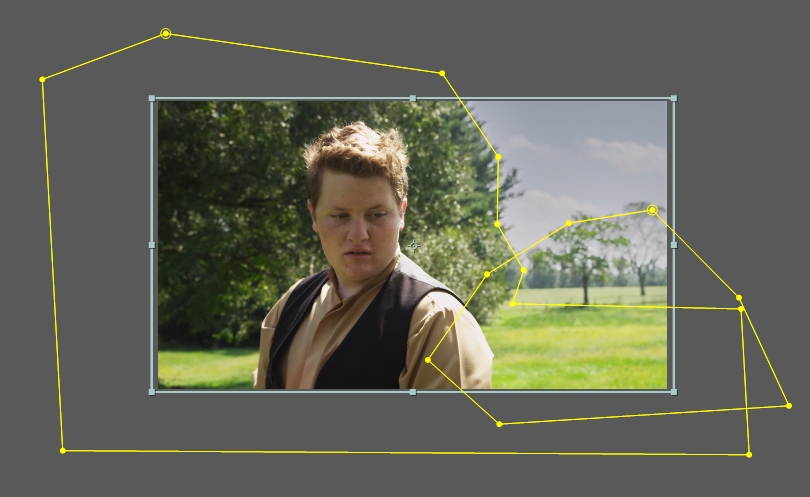
- A quick adjusment to the feathering and mask expansion properties for the mask will help achieve the right look to blend everything together. These parameters will also be specific to each clip’s footage and needs. You’ll be able to tell pretty quickly how you need to dial in the settings.
That’s pretty much it. From this point you can go on to do your final color correction or whatever else needs to be done to wrap up your footage.
I used this process with four different clips to create the following video illustrating the difference between no HDR and compositing with this method. To confirm, I did not do any final color correction processing to the video examples – only the HDR compositing as detailed in the tutorial process.
If you have any suggestions for people that might make this process easier, quicker, more efficient, or yielding better results – please share with a comment. Thanks!